Life changing bread

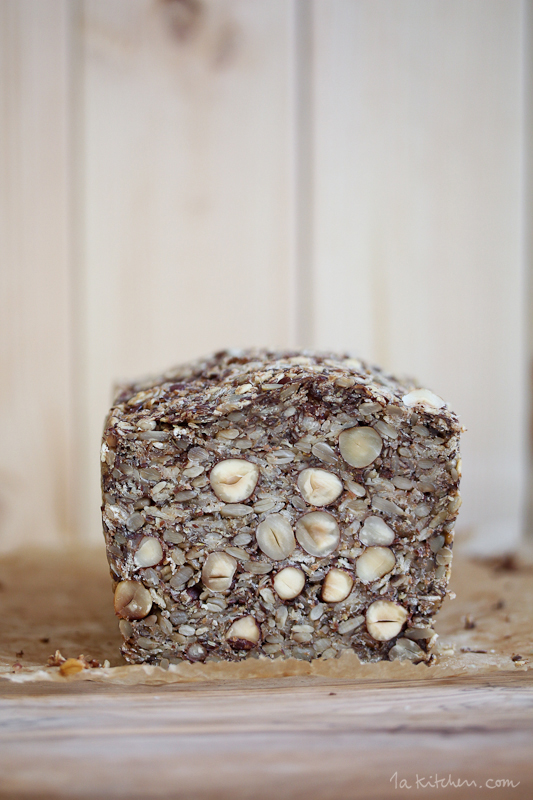
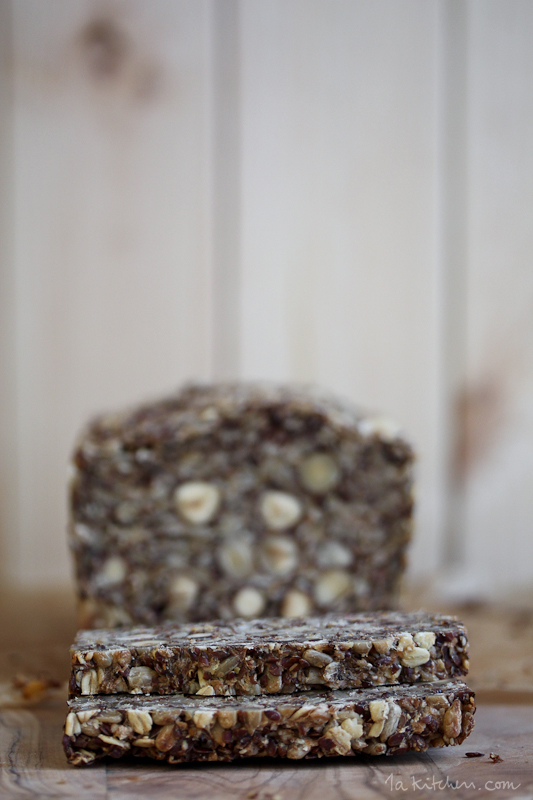
In the past years different versions travelled thru the internet of this ‘Life changing loaf of bread’. I love the basic recipe of the fantastic Sarah Britton with a twist, I skip the chia seeds (which I’d rather eat pure) and roast the nuts and seeds first. Although this requires a little bit more time in preparation, the extra effort is worth it by the more nutty taste due to the roasted flavors – a 1a trick!

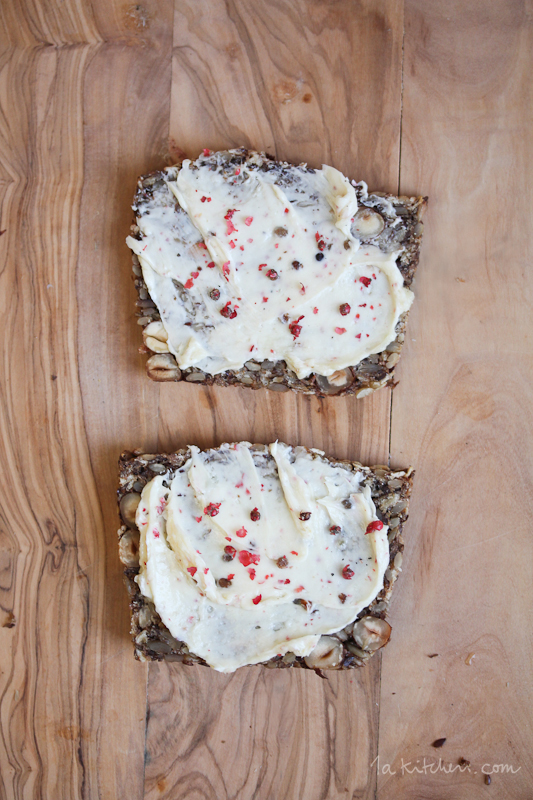
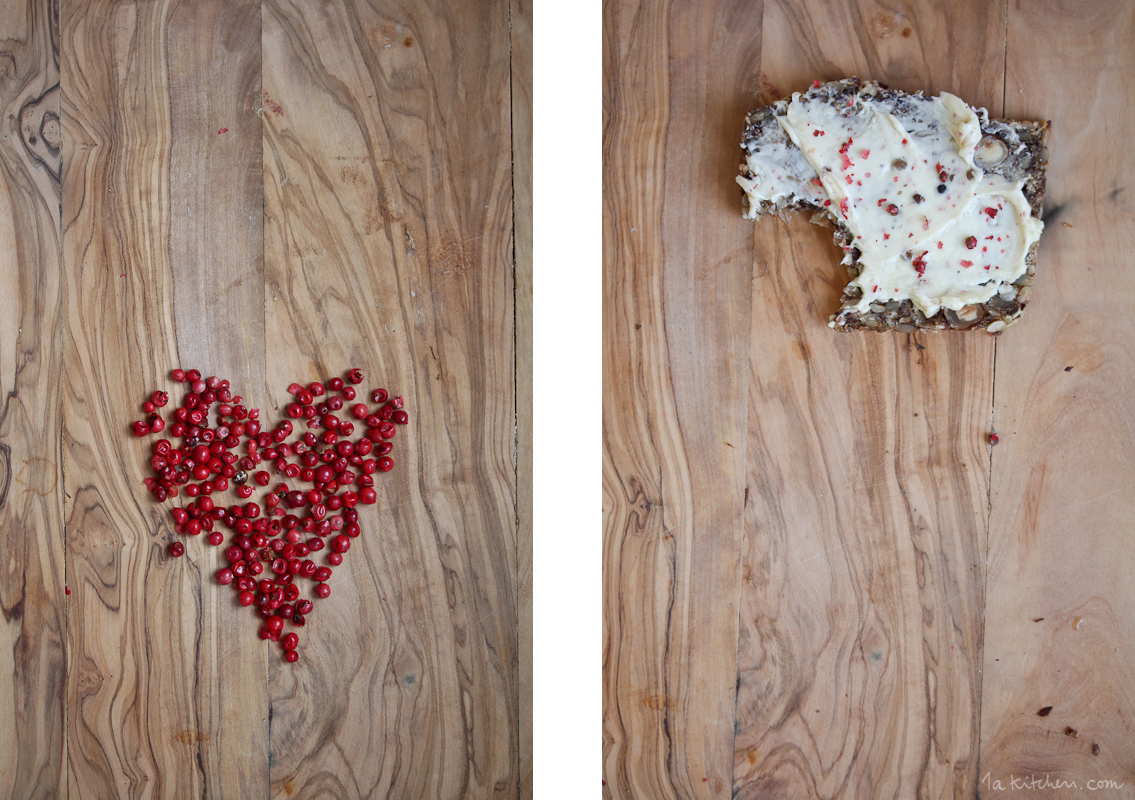
This goes quite excellent with a pink berry butter or vegan butter. Toasted is this bread showing really off by the way, so you should try that, too. It also keeps a relatively long time (probably due to the coconut oil?) and can also be sliced and frozen. Did I mention that it tastes deliciously toasted yet?

Life changing bread


So get ready to check your pantry! It makes no difference which flakes, seeds or nuts you use just keep the proportion. Flax seeds are highly recommended because of their high polyunsaturated omega-3 fatty acid content, plus they should be used shredded, uncrushed you get nothing of their oils, but they do improve your digestion.
Coconut oil is one of the most extraordinary fats ever and it contributes in many ways to your health – what should be mentioned here above all
is its cardioprotective ability, its support of the important functions of the brain and its anti-inflammatory and antimicrobial property. If you don´t like the (here really light) coconut flavor, simply use a refined tasteless brand like this mild coconut oil e.g..

However not replaceable is the psyllium husks, they not only have a positive effect on your blood sugar levels and digestion, but also keep the bread together. A warning, however, said the bread is very satisfying, but also very tasty. People who eat more than two slices of it should make sure to drink enough fluids as psyllium husks (also in the body) bind liquids.
The maple syrup in my opinion is not absolutely necessary, I have also baked it without any sweetener and have not missed anything. For completeness, it is listed with the recipe.

Another tip for making: its recommended in the original recipe to use a silicone mold. However I have baked the bread in a paper lined standard box shape numerous times – and it works great!

Life changing Bread


Life changing Bread

Life Changing Bread (modified from here):
Recipe for a standard bread box

Ingredients:
_ 2 cups sunflower seeds, dry roasted
_ 1 1/2 cup hazelnuts or almonds, dry roasted
_ 1 cup flax seeds, shredded
_ 3 cups spelled, oat or buckwheat flakes (or a mix)
_ 6 Tbsp levelled: psyllium husks, eg. these
_ 2 tsp fine good quality salt (rock salt, virgin salt or sea salt)
_ 4 Tbsp chia seeds (optional)
_ 2 Tbsp maple syrup or honey (optional)
_ 6 Tbsp melted coconut oil
_ 3 cups warm water

preparation:
_ Roast sunflower seeds and nuts/almonds in a dry skillet over medium heat while moving over again. Set aside.
_ Meanwhile melt 6 tablespoons of coconut oil and place in 700ml warm water, add sweetener as you prefer.
_ Line a loaf tin with baking paper (silicone mold will not need it) and combine all the dry ingredients in it.
_ Add the liquid, mix all ingredients with a spatula or wooden spoon (if necessary add a little more water) and rub the surface smooth.
_ Now leave the bread at room temperature at least for 2 hours or overnight, until the mixture has settled. In a silicone mold, you can move the mold and the bread remains stable.
_ Preheat oven to 175 degrees
_ Bake bread for 20 minutes, then carefully remove from the mold (pulling on the baking paper) or flip the silicone mold. Bake for another 40-50 minutes, until the bread sounds hollow when tapped.
_ Let it cool completely (yes, that’s hard), slice and enjoy!

Tip: This recipe can also be adjusted to a great fruit and nut bread like, I will show you next week! Or you indulge into some inspiration here, I’ve just discovered on Instagram. And psst as you can see, I’m not alone with my toasting trick.

Life changing Bread

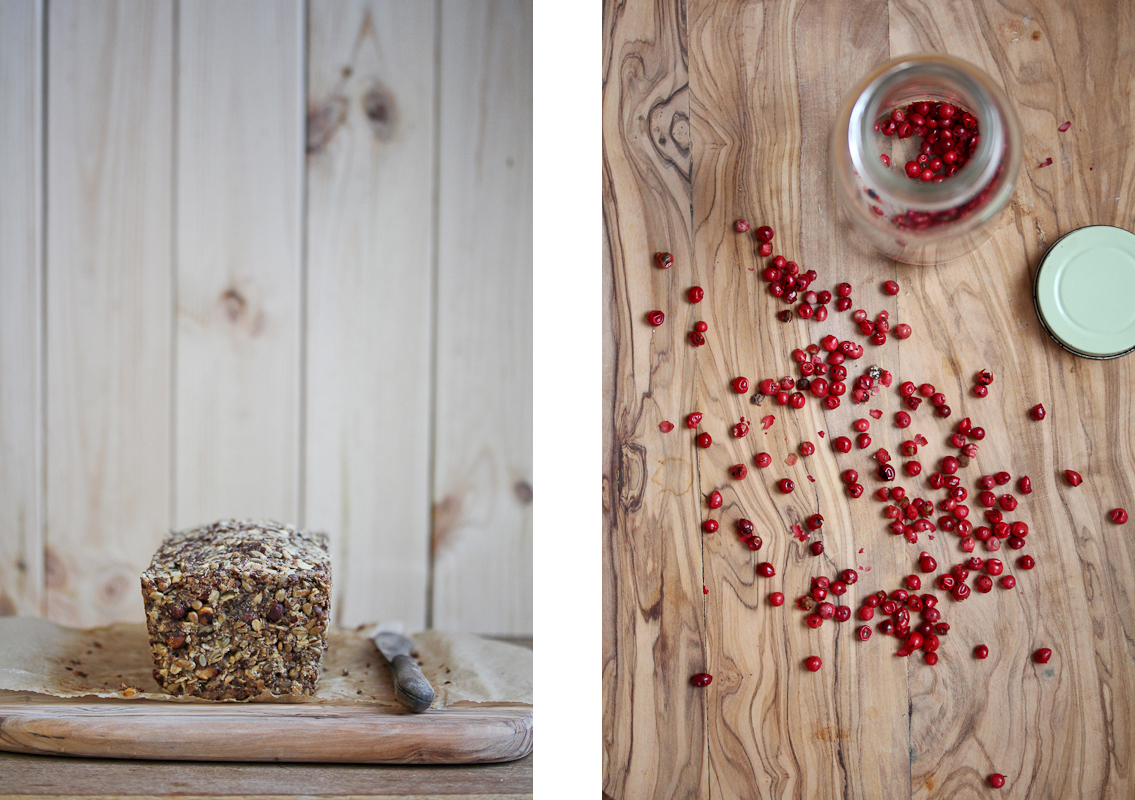
Let´s get to the topping: actually this needs no real recipe, it´s just flavored butter with pink peppercorns, which is actually not real pepper, but we don´t mind – it´s that delicious.
Time: 5 minutes.
Enjoyment factor: Bomb!

Butter with Pink Peppercorns

Ingredients:
_ A packet of butter or vegan butter
_ and here’s how:
_ Take butter / vegan butter best ahead of time out of the fridge.
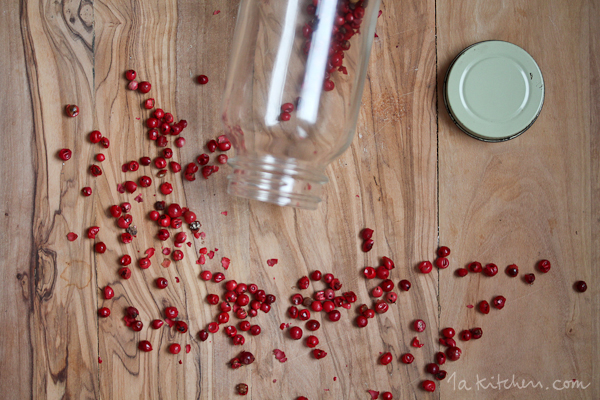
_ Crush pink pepper in a mortar (I usually start with 1 tablespoon and then go to my taste), alternatively you can chop the berries with a large flat blade.
_ With a hand mixer stir the butter/vegan butter, add pink berries and salt to taste.

Voilà!
This not not only tastes great on bread, baguette or brioche, but also with potatoes or vegetables. When bottled airtight in the refrigerator it keeps for several weeks.

Pink Peppercorn Butter Rosa Beeren

Read More
Apelpunsch

In a week already is Christmas.

Somehow December, the older I get, passes faster and faster. Quasi in four times fast video search. It was just October, and hey, it´s the third advent now.

Far are the days of childhood when we brothers and sisters flattened our noses at the kitchen window, in anticipation of the Christ child at the edge of the forest. We could hardly wait to finally open another door on the Advent calendar.

Read More

golden milk

golden milk

Golden Times.
I have a new favorite drink.
A warming companion, a golden mood lifter, almost a magic weapon.
The golden milk.

For quite some time I have been stumbling again and again about interesting references to the healing powers of turmeric. We know it especially as the main ingredient of curry, to which it gives its strong color among others. The taste can be best discribed with spicy-bitter and in the right dosage it goes bothe well with savory and sweet dishes.

The effects of the ginger family are manifold and it is not surprising that the yellow root both in Ayurvedic and Chinese cuisine plays an important role as an everyday remedy.
To name a few: Turmeric detoxifies the liver, counteracts bloating and stimulates digestion. The curcumin in turmeric has a strong anti-inflammatory and analgesic impact and is therefore primarily used for any form of arthrosis and rheumatic deseases. Even in the prevention of Alzheimer it is meant to play a role. It has a strong antioxidant, antiseptic effect and strengthens the immune system, lowers both blood sugar as well as high blood pressure and acts to control cholesterol levels.
However, the most striking effect of the root is perhaps its anti-cancer effects – curcumin seems to both help to prevent cancer growth and inhibit metastasis. If you want to learn more, you might find this book interesting.

Since curcumin is poorly soluble in water, it is used generally with a high quality oil, eg Coconut oil or another native oil. It is also highly recommended to add some ground black pepper, as the alkaloid piperine contained in pepper increases the absorbability of curcumin by a factor of 2,000 (!). Piperine is mainly found in black pepper and long pepper and is not only responsible for the pungent taste, but also healthy for the digestion as well as a catalyst for the absorption of nutrients.

Turmeric is therefore a truly wonderful way of nature, considered it essential to have a closer look.

And this is where the ‘Golden Milk’ comes in, an ancient Ayurvedic recipe with turmeric powder – an occasional drink that brings all mentioned positive effects of curcumin, is quick to prepare and tastes surprisingly good. Especially in cold temperatures and when influenza viruses go around, this recipe works, taken twice a day, as an immune-boosting and soothing remedy.

Taken in the evening before bedtime, it also aims to promote a peaceful sleep.

The easiest way is to first create a turmeric paste, which keeps about 2-3 weeks in the refrigerator and cannot just added to plant based milk but also to rice or yogurt.

golden milk

Turmeric paste
Basic Recipe

_ 1/4 cup of ground turmeric (from the health food store or here)
_ 1/2 cup of water (filtered if possible)

Simmer mixture over medium heat for a few minutes to create a paste, stirring constantly with a wooden spoon. Add a little water if the consistency is too firm, the paste should be firm but not plump. The water should be of good quality as possible, depending on the city tap water might need to be filtered first (eg with a carbon filter) or use spring water.

This video I found very helpful.

Once the paste is finished, the golden milk is prepared very quickly. I prefer to use oat milk or (homemade) almond or nut milk, but also spelt or coconut milk are good options. Oat milk is inherently so sweet that I do not need more sweetener. On the contrary, I like to give another shot of water, so that the drink is less sweet. In the original Ayurvedic recipe I have found no use of black pepper, but there are countless recipes of the Golden Milk and since the effect of piperine in combination with curcumin is so impressive, I have a recipe for you with pepper and coconut oil. If you want to add a little sweetness, I recommend to use raw honey (add only if the drink is cooled to drinking temperature) or maple syrup if you prefer vegan. Should you use instead of virgin coconut oil another oil (eg sesame, sunflower, linseed or almond oil), so add the oil when the mixture is cooled down a little as not to destroy the important nutrients.

(Edit: I found a new hack, that is a lot quicker and more convenient. Just check out this powdered recipe mix.)

Golden Milk
Recipe for 1 cup

_ 1 cup of plant based milk
_ 1 tsp turmeric paste or more
_ 1 teaspoon extra virgin coconut oil or other natural oil
_ ¼ teaspoon ground black pepper or more, to your taste
_ If necessary some water to dilute
_ Sweetener  to taste

_ Bring the oat milk with the turmeric and pepper to a boil while stirring, for some minutes. Mix milk in a 2:1 ratio with water if, like me, you prefer a less dense and sweet taste.
_ Pour the milk into a cup or ovenproof glass and add the coconut oil, stir until it has dissolved. I add here a shot of cold water, too, so the milk is cooled down a little and ready for immediate drinking and I usually adjust the pepper to a slightly hot taste, too.

Here´s to you!

I have been successfully counteracting throat aches and other unpleasant symptoms of a cold with this recipe, and I do hope that golden milk makes you feel just as good.

golden milk

Read More

trick#8b

Cutting tricks Galore.
What you can do with an apple, of course, goes well with avocado.
Well, one needs a tablespoon to separate the avocado cubes. But then it goes in under half a minute and dare I say, I never ‘cut’ an Avocado ever any differently no matter if we are camping, picknicking or at home.
And that´s how: with a knife carefully slice the avocado all the way down to the skin, about 4-5 times. Now take a Tablespoon and use it as shown. For me, a number 1a trick!
What is your Number one trick?

Read More

1a kitchen trick

Whee, time to engage again in the 1A-bag of tricks. And do you guys already know Thomas Joseph? When I´d like Martha Stewart, the queen of the country life with style (and anything important concerning housekeeping, cooking, baking, decorating and celebrating), to be my great-aunt, with whom I could philosophize about the intricacies of kitchen trim, while arranging the flowers in the vases new – then Thomas Joseph would be the one whose number I´d dial at 1 o´clock at night, because the croissant dough after 10 hours and the twelfth time to fold and rotate somehow falls apart (and thats probably what Martha would, too). (When this now sounds cryptic, then you should read a recipe for croissants.) Anyway, Thomas Joseph is my new star in the kitchen trick sky and I highly recommend his videos, especially during a full moon or other circumstances that cause insomnia. Or even on a Sunday morning in bed with a coffee in hand.

Incidentally, I recommend this video here as a starter and dare to say that if everyone knew about this secret, the world would be a little better. But beware, it´s highly addictive. I for one can watch the videos of Monsieur Joseph again and again.

But back to the tricks that tend not so much to help at 1 at night, but early in the morning and especially when the Internet and possibly even a cutting board are far far away, because, let’s say, you are camping. Not that summer is already over, and you can also quite wonderfully cut an apple for your breakfast Muesli in your domestic kitchen (and also there could be cutting boards gone missing anyway or they could be stacked up somewhere, not really accessible). For those moments, I recommend the Apple Cutting Trick as shown above, which has been passed on from my dear Mother whom has (so I think to remember) learned this one with the Girl Scouts. _ Take 1 ripe apple _ A knife that is sharp and lies well in the hand, for example this one.

_ Now cut the fruit all around from top to bottom carefully to the core (like you would peel an orange). Choose the sections as far as the edge length of the apple pieces you want. _ Now cut the apple 90 degrees rotated and horizontally around to just the core, about 4-5 cuts. _ Now comes the best part: cut flat discs from the pre almost-cut apple, so that small pieces fall down. What remains is the carefully ‘cut down’ apple core. _ Voilà! 1A apple pieces, without any chopping board. Of course, this quite excellently applies also to pears.

Read More